
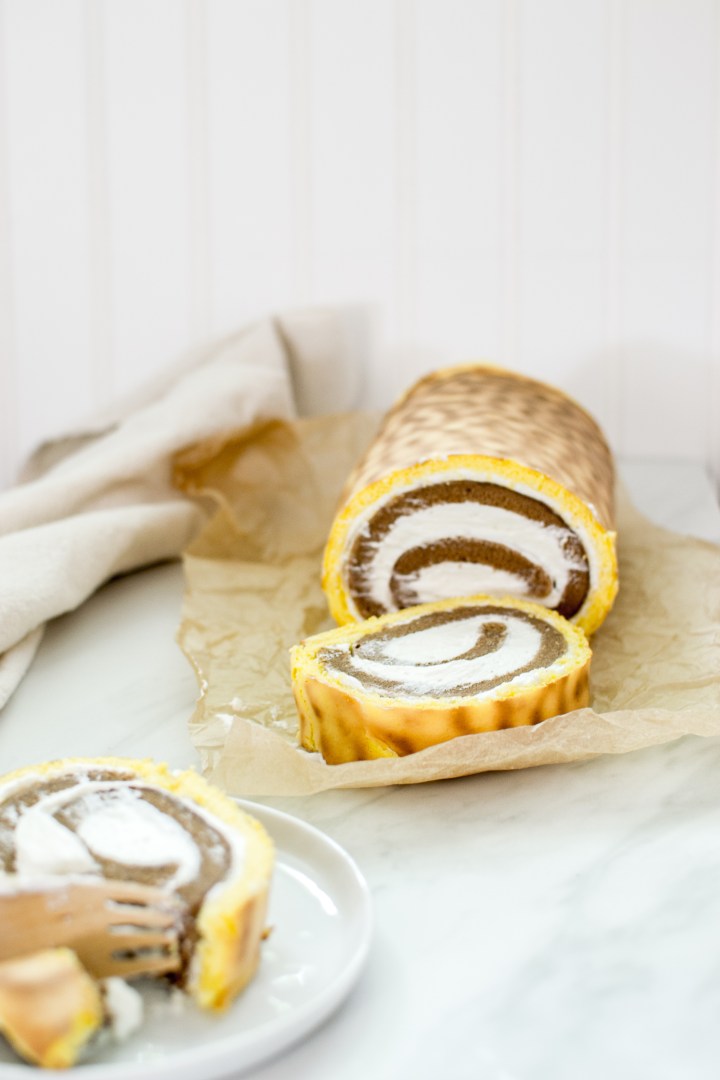
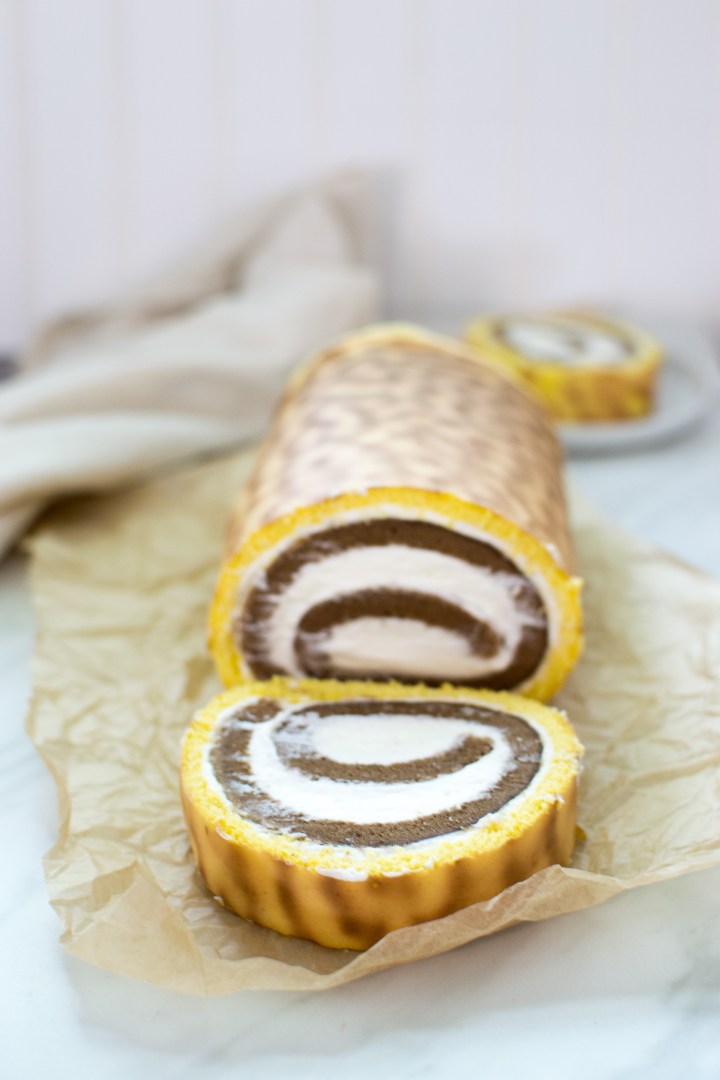
Yesterday was Mother’s Day, and I didn’t get to celebrate with my mom since we live on opposite coasts of the country. But in reflecting about my childhood with my mom, I am often brought back to going to Asian grocery stores (mainly 99Ranch). Like most grocery stores, Asian grocery stores often come equipped with a bakery section that churns out cakes and pastries. One of my family’s favorite was the tiger skin swiss roll (虎皮蛋糕). Maybe it’s because my brother’s zodiac is the tiger? I’m not sure, but we always pick one up for special occasions and celebrations.
I never attempted tiger skin rolls because I thought it would be difficult. The construction of it clearly indicates that it is formed from 2 types of cakes. There is the normal sponge in a swiss roll and the outer layer that forms the tiger stripes. I decided to tackle that challenge and bake a tiger skin swiss roll.
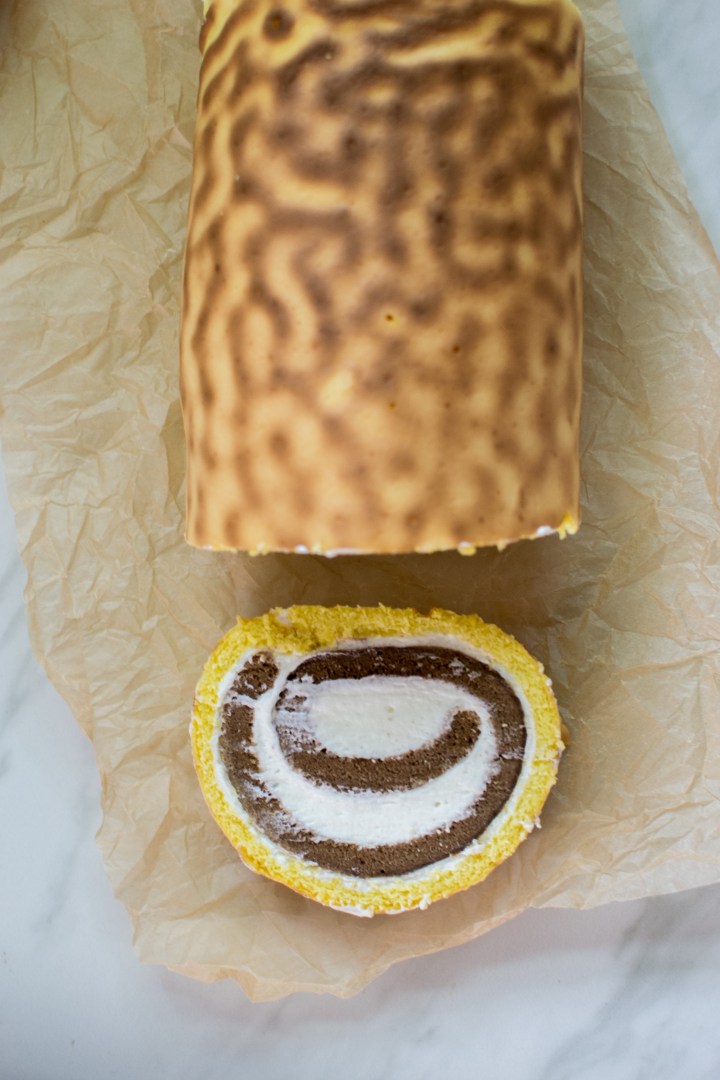
From my research, I have learned that the tiger skin portion is baked from cornstarch in lieu of flour. Cornstarch will cook very fast and form the crinkle that resembles tiger stripes that traditional cakes cannot. The rest of the cake is fairly straightforward. It might seem complicated from the lengthy instructions, but I promise this cake is quite simple and well worth the effort!
Tiger Skin Swiss Roll
Ingredients
Chocolate Swiss Roll
- 4 large eggs
- 1/3 cup granulated sugar
- 1/2 cup cake flour
- 2 Tb cocoa powder
- 1/4 cup milk
- 1 Tb unsalted butter
Tiger Skin Roll
- 5 egg yolks
- 1/2 cup powdered sugar
- 1/4 cup cornstarch
Whipped Cream Filling
- 1 1/2 cup heavy whipping cream
- 1/3 cup granulated sugar
- 1 tsp vanilla extract
Method
- Make the swiss roll: Preheat oven to 375°F. Line a 9×13 jelly roll pan with parchment paper.
- In a microwavable bowl, heat milk and butter until butter is melted. Set aside. In a large heatproof bowl, beat together eggs and sugar for about 2-3 minutes. Place the bowl over a double boiler, and continue beating until the mixture is thick and pale (and pass the figure 8 test). Sift in cake flour and cocoa powder and fold using a spatula. Lastly, fold in melted butter and milk. Bake in preheated oven for about 10-12 minutes, until the texture is spongy and has a slight bounce when you tap it.
- Cool the cake in the pan for about 5 minutes, then lift the cake out of the pan, and gently roll the cake loosely to resemble a swiss roll. Place the cake seam side down and allow it to cool completely while holding this shape. This will help the cake “remember” the roll later.
- Make the tiger skin: Preheat oven to “broil” setting. Line a 9×13 jelly roll pan with parchment paper.
- Beat together egg yolks, cornstarch, and powdered sugar on high speed for about 5 minutes. Pour prepared mixture on prepared pan. Place on center rack in the broiler for about 2-3 minutes. Watch the cake very diligently! When you are happy with the shading of the tiger stripes, take it out. Repeat step #3 (cooling and rolling process) with this cake as well.
- While cakes are cooling, prepared whipped cream filling. In a large mixing bowl, beat together heavy whipping cream and sugar until light and fluffy, just shy of stiff peaks. Beat in vanilla extract.
- Unroll the cooled chocolate swiss roll and spread about 2/3 of the whipped cream all over the inside of the swiss roll. Roll it back tightly, pulling away from the parchment paper as you roll. When you are done rolling, put it seam side down.
- Unroll the tiger skin roll. Spread the remaining whipped cream over the inside. Place finished chocolate swiss roll on top of the tiger skin roll and roll it tightly. Again, place seam side down. Allow cake to retain shape in the refrigerator for at least 30 minutes before serving.
Recipe notes:
- If your oven broiler has options for Hi/Lo, make sure to set it to low to have more control when baking the outer layer.

as continued from my past review, this recipe is difficult to follow. More specifics, oven rack level for the tiger skin, would have ensured better results. Again, never trust a page with no online reviews like I did! Raw cornstarch and mild salmonella weren’t enough to end me, but you have the opportunity to be more careful. Take it. Walk away.
LikeLike