This is probably my favorite DIY, period.
Making my own dryer balls was probably one of my first zero waste switches. My skin is very sensitive to synthetic fragrances. Dryer sheets makes my skin very itchy, so I’ve always opted not to use them. Also, there are some debate out there that dryer sheets might contain potential toxins. Although most of the claims are unfounded, I like to stay away from “questionable” products until a definitive conclusion has been reached. There are many benefits to using wool dryer balls, such as:
- Good for sensitive skin
- Cut down dryer time
- Saves $$$
- Customizable scent
- Reduce static cling
- Eco-friendly
Since these wool dryer balls last a very long time, you can essentially replace your dryer sheets with them. For a while, to accommodate with my sensitive skin issues, my mom used silicone dryer balls. However, they deteriorate quickly under the hot heat and ripped within a year. So although they did do their job, they didn’t hold up long enough to be cost-effective.
The wool dryer balls will cut down your drying time, thus saving you money on electricity. You can also add your own essential oils directly on the dryer balls during a dryer cycle, and your laundry will smell so good!
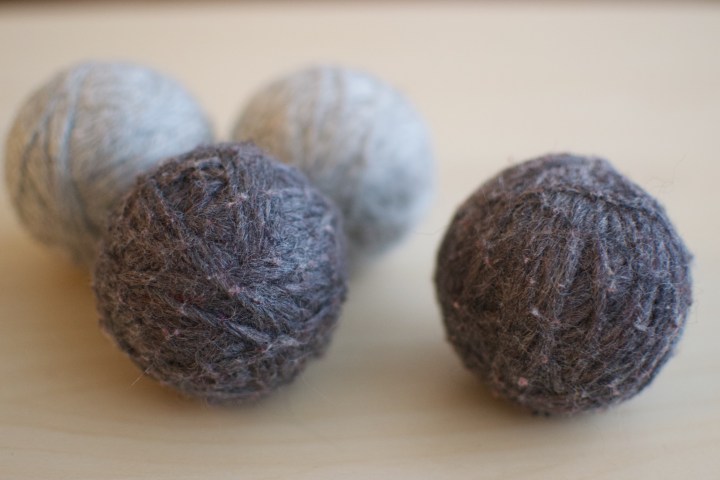
I’ve made this DIY 4 times now because I love it so much, I make it for friends and family. Originally, I made these dryer balls using wool yarn from my local crafts store. You can see the finished product on my featured image for this post. But then I realized that one skein of yarn produced only 3 dryer balls, and it was quite expensive. A skein of wool yarn usually costs $6 without coupons or discounts. The other downside is that wrapping thin wool yarn into a good-sized ball is time-consuming. Although I did like the look of the felted yarn balls, I wondered if there was a better alternative. I am happy to announce a cheaper, easier, and faster alternative to making these wool dryer balls.
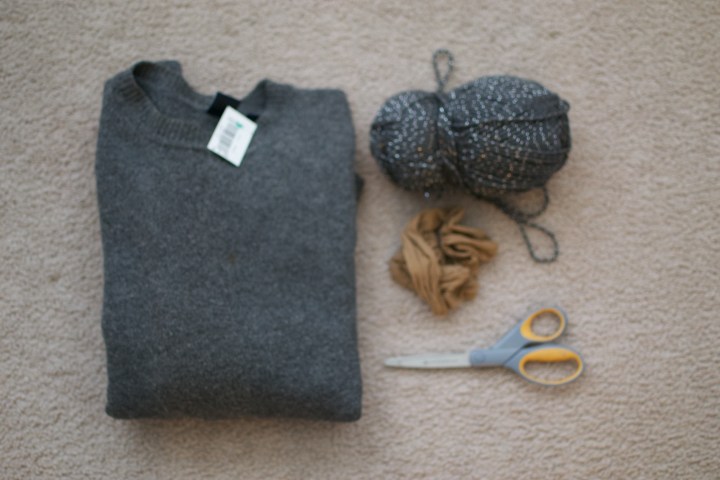
Materials
– 1 wool sweater
– Acrylic or cotton yarn
– 1 pantyhose
– Fabric scissors
A few notes on the materials:
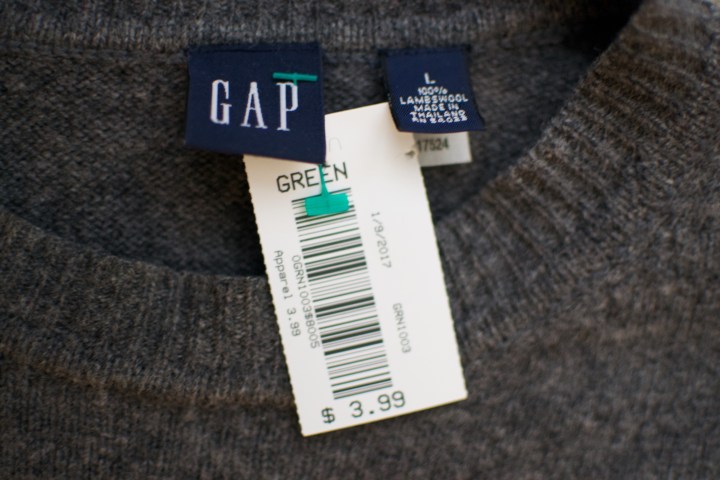
- Make sure your sweater is 100% wool. We want this wool to felt (turn it into this fuzzy texture). A good way to see if it’ll felt is to look at the care instructions. Typically, wool that felt will say “Dry Clean Only”. You want to look for those.
- For the yarn, you want to make sure you use acrylic or cotton yarn (not wool yarn) because the wool yarn will felt around the pantyhose, making it difficult to remove.
- For the pantyhose, you want to make sure you use a thin nylon pantyhose that you don’t mind cutting up.
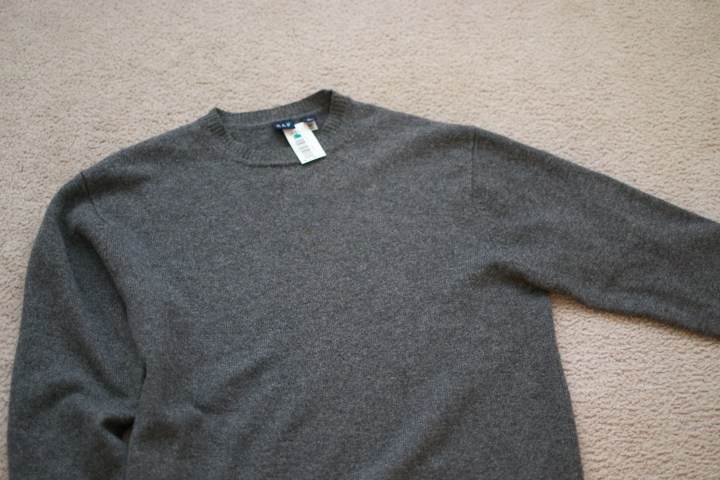
Since I knew I was going to be cutting up a wool sweater, I hit up my local Goodwill for an affordable sweater. Since these are going to be bouncing around with your clothes, you want a neutral color that won’t bleed onto your other clothes (stay away from reds!). I start at the L-XL section, because hey, you get more fabric! I don’t really care about the condition of the sweater, because it’s going to be cut up anyway. I just care that it is 100% wool. I found a large women’s sweater from GAP for $3.99. I ended up paying only $1.99 for it because at my local Goodwill, they offer a 50% discount on certain colored tags throughout the month. I am lucky because this week, green tags are 50% off.
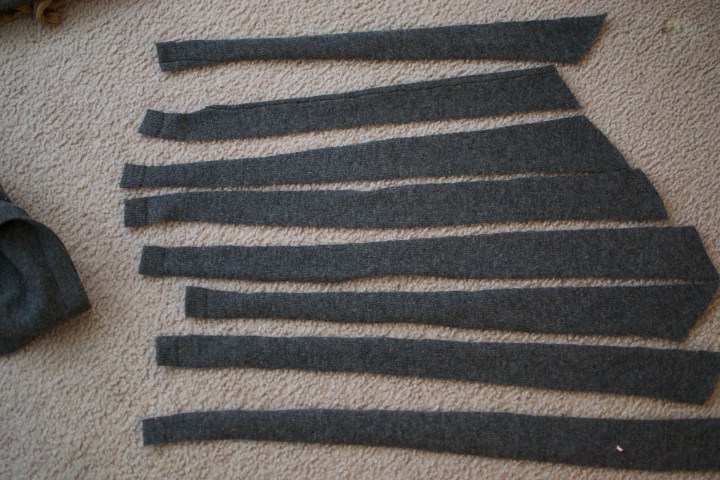
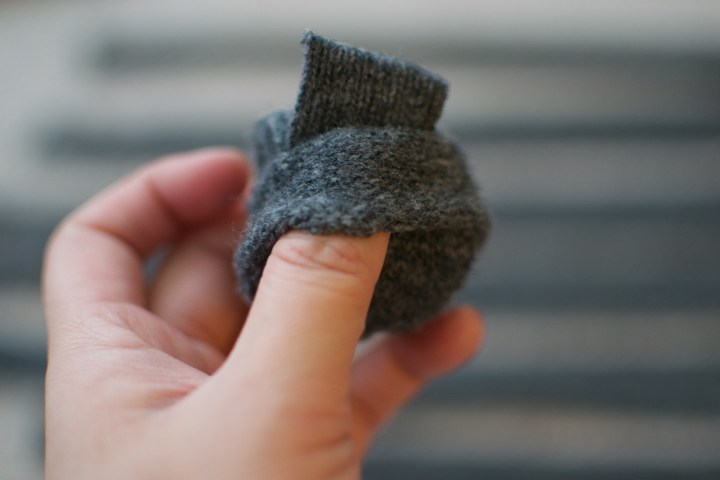
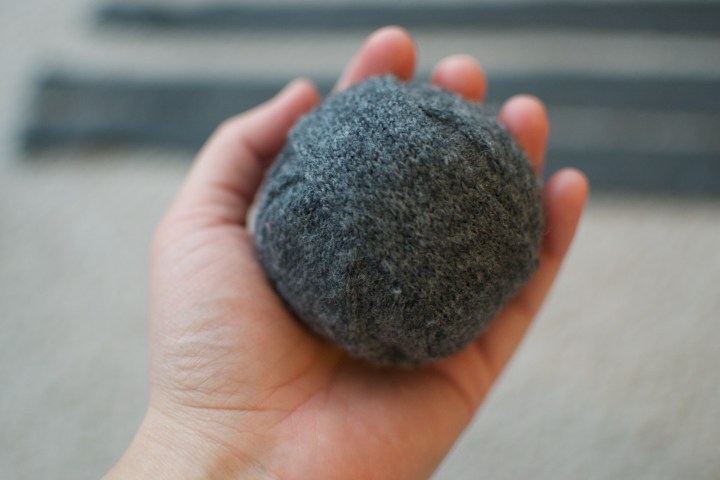
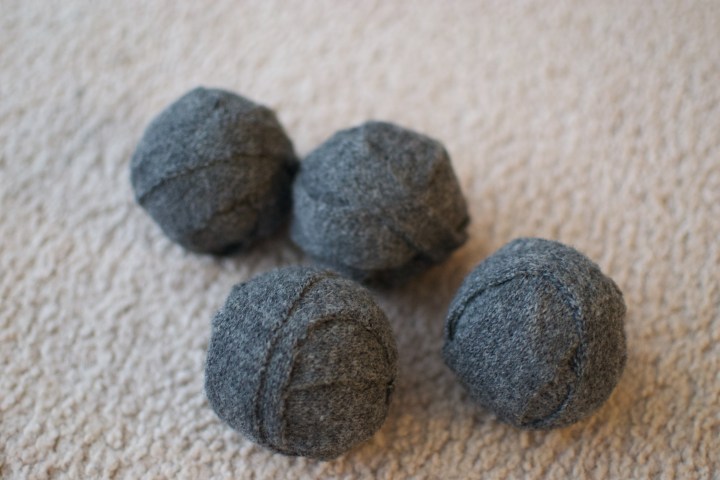
I removed the price tag and the labels with my scissors. Then I laid the sweater flat on the floor. There are many ways you can do this, but I like to cut off the sleeves first. Then I cut the side and top seams to detach the front and back. Then you will need to cut the sweater into 1-1.5 inch strips. Take one strip to start, make a knot at the end (this is your starter ball), then slowly and tightly wrap the rest of the strip around it. When you come to an end, tuck the ends in. Keep adding additional strips of fabric until you reach a good size ball (like a tennis ball). For this sweater, I used 4 strips per ball.

Once you have your collection of balls, you are going to put them in your pantyhose. I typically use a really old pantyhose that has been torn or is irreparable. Cut off one leg of the pantyhose. Start stuffing your dryer balls in to the pantyhose. Once all the dryer balls are in the pantyhose, cut strips of cotton or acrylic yarn about 5 inches long. Tie a knot between each ball. This will prevent the balls from felting to each other. I don’t tie a dead knot because I like to reuse my pantyhose and yarn to make this project again. When you are finished, it should look like a long yarn caterpillar.
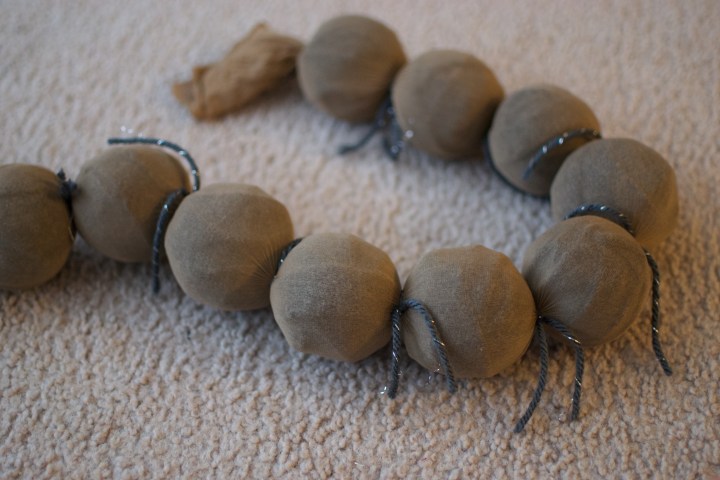
To felt them: I recommend washing this first with towels or bedding, because those typically are washed in a hot cycle. You are going to throw your wool caterpillar in with your regular load. Set it to a hot wash cycle. Then throw everything into the dryer and dry on high heat. Typically, it should felt in one wash/dry cycle. But don’t unravel your caterpillar yet! To check: use your fingernail to gently pick at one of the balls. If you can feel the wool strips moving, it’s not done. You just simply have to do the wash/dry cycle again. When you pick at it with your fingers and it’s not moving, it’s felted. Carefully remove the yarn and release your brand new dryer balls that you made yourself!
To use: Toss 2-4 balls for a small/medium load, or 4-6 for a large load in the dryer. If you would like, you can drop 1-2 drops of essential oil on the dryer balls to give your clothes a nice fragrance. I find that when I drop essential oils in, it will last several cycles, so I only do it once a month.
I did a quick search on Amazon and found that 6 of these dryer balls cost around $15. For $2 in materials, I made 12 dryer balls total, and it only took about 30 minutes. Totally worth it! I hope you enjoyed this DIY tutorial. If you tried it out, let me know in the comments below if it worked for you :)

Wow! Cool idea!
LikeLike