

Hey y’all! It feels good to be back. These past few weeks have been so hectic with planning out projects around the house, figuring out what we are contracting out and what we are tackling ourselves. Most people don’t know this, but Ian and I aren’t full-time renovators nor do we have a background in home renovation. We kind of just fell into renovating our last home and really enjoyed the process of turning a house into a home. Ian only works on the house on Saturdays (we don’t do any renovations on Sundays to really enjoy time together as a family). Since I work from home and I work for myself, the time I have to spend on home renovations really vary day to day.
All that is to say, I decided to tackle a project all by myself. I decided to give our master bathroom a refresh on a budget. I decided to give myself a $500 max for this refresh, but I think I’ll stay end up staying under $300 since most of the things I’m doing is painting.
So here is what the bathroom looked like the day we got the keys:


Our master bathroom gets a lot of natural diffused light throughout the day, and it has vaulted ceilings with a skylight. Yes, it’s very dated and screams ’90s. But I think a few things will spruce it up and bring it up to date:
- Paint the tile a fun pattern to mimic encaustic tiles
- Paint the vanity cabinet
- Update the old laminate with a DIY concrete countertop
- Replace the medicine cabinet with recessed cabinet
- Replace the wire shelving in the linen closet with wooden shelves
- New light fixtures, mirror, and faucet
- Wrap the tub with board and batten
- Paint the shower frame a matte black
The first thing I wanted to tackle was the floor. Since 2017, I’ve painted a number of ceramic floors, and I think it’s my go-to move with it comes to tile that I don’t particularly dig. Gutting is a whole process that is messy and expensive. Painting is a fast and affordable way to achieve a look that is modern and in-style. Best of all, it actually holds up! There are a lot of great tutorials online on how to paint ceramic floors that go in-depth. I’ll make mine somewhat brief.
How to paint ceramic tile floors
- Clean the floors with a degreaser-type cleaning agent. I personally just use a 50/50 mix of water and vinegar. Let floors dry completely.
- Use a 120 grit sandpaper and lightly scuff the floors all over. Vacuum up any dust and wipe the floors down with degreaser again. Let dry.
- Using a roller, apply 2 coats of primer according to instructions on the can. Let dry.
- Apply 2 coats of chalk paint. I used Rust-Oleum’s Linen White chalk paint as my base color.
- Using a stencil (or tape your pattern), apply the second color of chalk paint. I used Behr Decorative Chalk Paint in Deep Thought. I did 2 coats of this second color.
- After everything has dried overnight, remove any tape used and apply 3 coats of Minwax polycrylic.
Materials used
- Zinsser Bulls Eye 1-2-3 Primer
- Mini Paint Roller
- Rust-Oleum Linen White Chalk Paint
- Behr Decorative Chalk Paint
- Minwax Polycrylic in Clear Satin
- 1/4″ Painters Tape
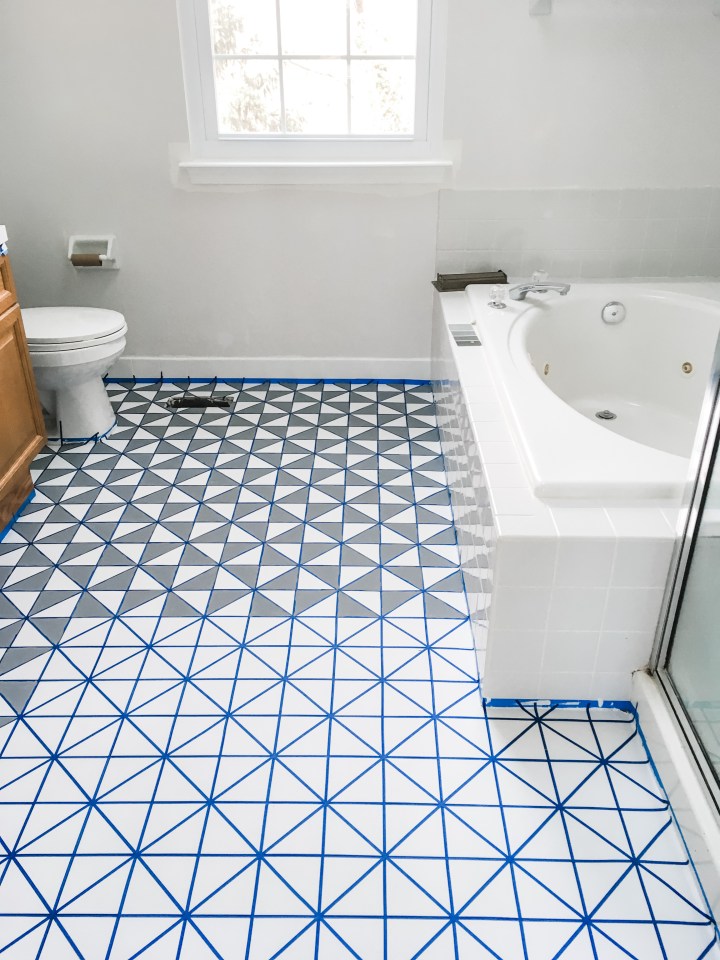
Let’s look at some progress photos!
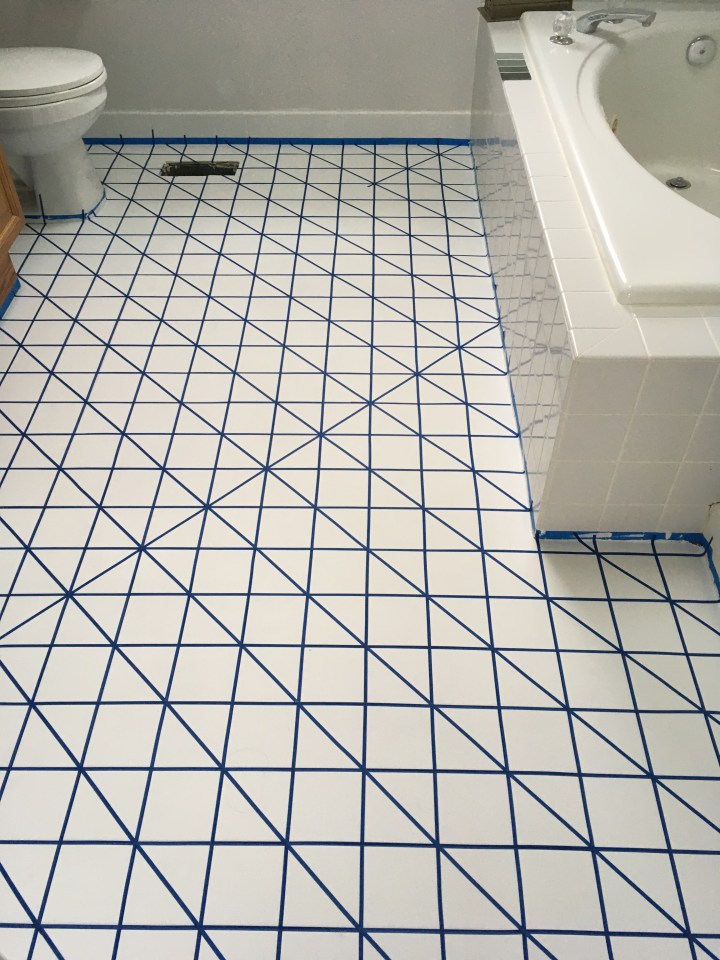
The tile I was working with was those 4×4 ceramic square tiles that were really popular a few decades ago. You can see the tile surrounding the bathtub is the original tile. In these pictures, I had already painted the primer and the 2 coats of the white chalk paint on. Since these tiles were little, I figured the grout lines could act as perfect dividing lines for a pattern. I decided to do a pinwheel pattern. So how I achieved this was taping the grout lines first horizontally, then vertically. Then run them diagonally.
Here is what it looks like once everything is taped off. To achieve the pinwheel look, the top color goes on every other triangle.
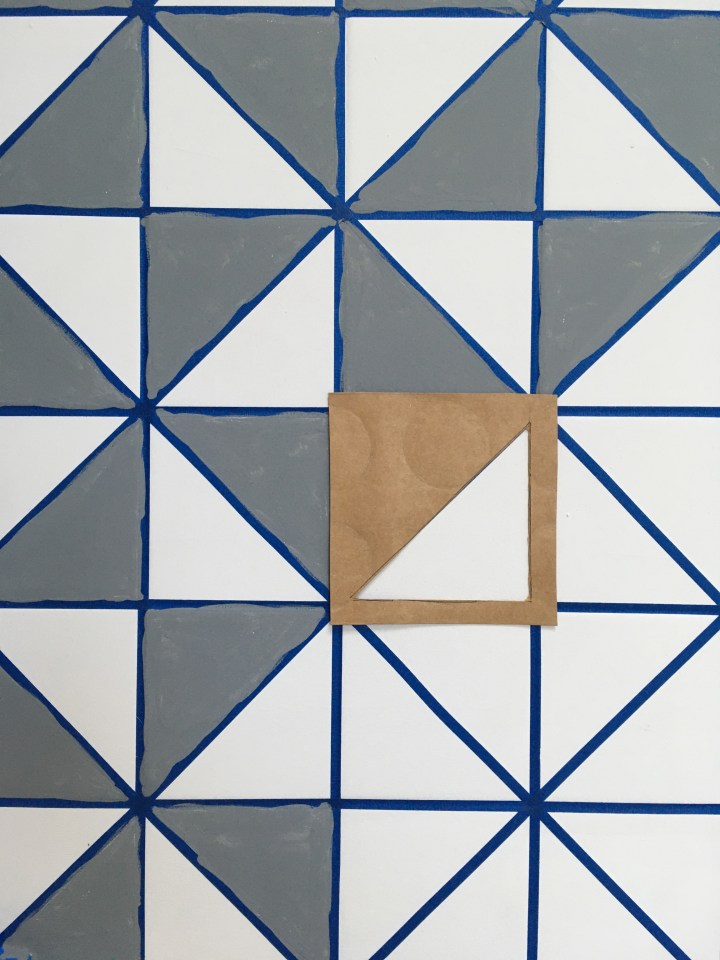
I tried several methods in painting the top color (the gray) on. First, I tried just using a paintbrush to brush it on, but it was really time-consuming to stay within the lines. I DIY-ed a stencil out of scrap cardboard and used that. That worked pretty well, but I still wanted it to go faster.
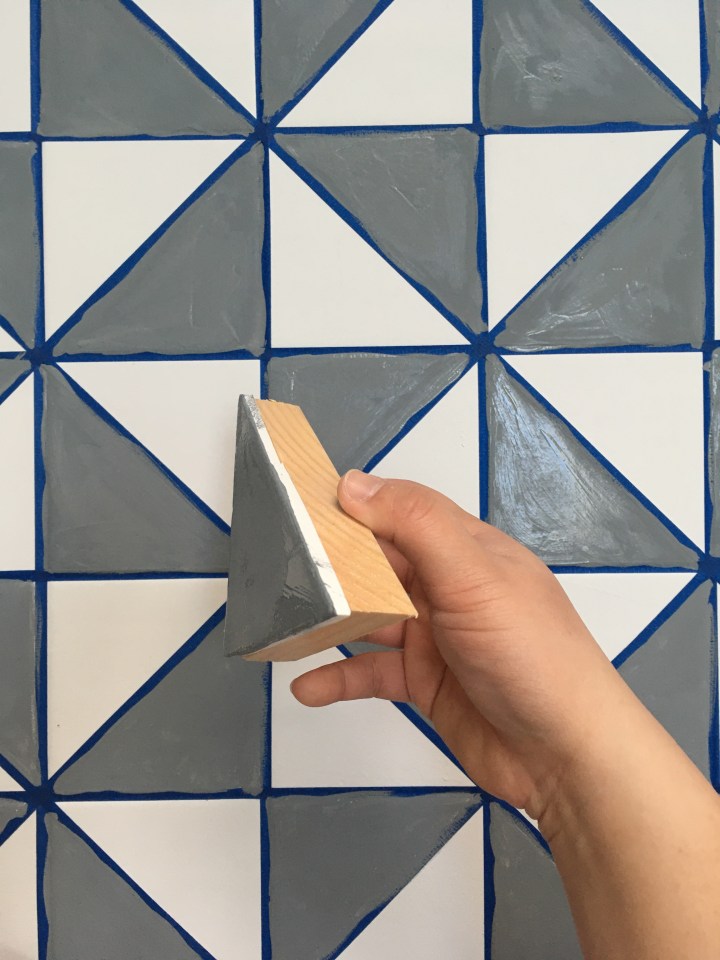
So I went to Michael’s and grabbed some 99 cent craft foam, and measured out the size of the triangle. I then used some scrap wood to glue onto the craft foam to make a stamp. This went a little bit faster. I would stamp out the pattern, then used a brush to fill in any edges.
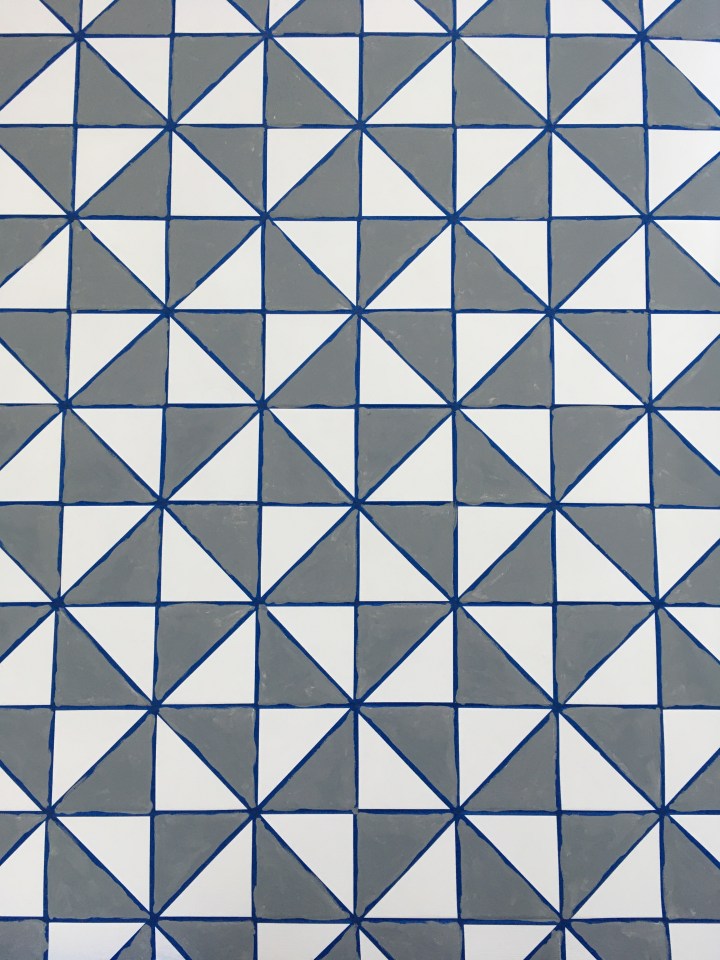
This is what it looked like after one coat.
It is easy to see from this picture why I needed a stamp to make things go faster. These are very small triangles and I was dealing with over a hundred little triangles!
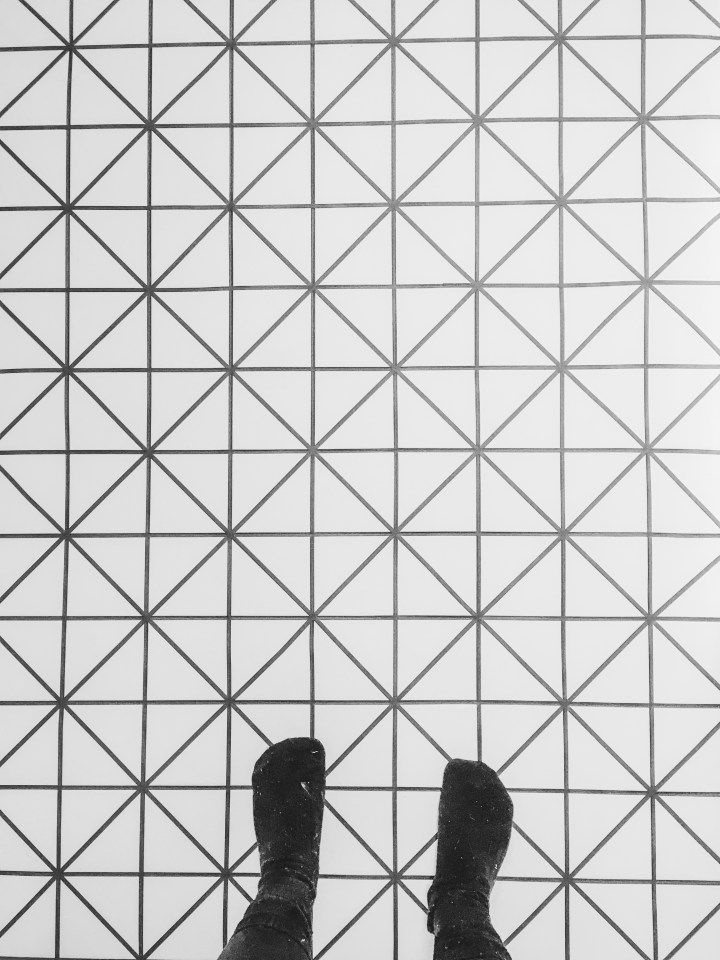
After I finished the two coats of the second color, I removed all the painters tape used to make the pattern and applied 3 coats of polycrylic. This floor went from very drab and boring to so darn fun! It also really sets the tone of this modern bathroom I’m going for. I’m excited to continue to move forward with this bathroom refresh!
