

I love a good before and after, and boy, do I have a good before and after for you.
Our suburb house (Squirrel Estate) has so many things that scream 90s to me – golden brass hardware, dark granite, cherry and oak cabinets. Since that’s absolutely not my style, I’ve been working hard these past few months at transforming it into a cozy, modern home.
Our living room is a good-sized room with a lot of natural, filtered light. We plan on making this our hangout spot/library. The one thing that I really didn’t like about the living room was the fireplace. The dark granite, the dark cherry color, the overly-decorative trims, nothing about this fireplace looked good to me.
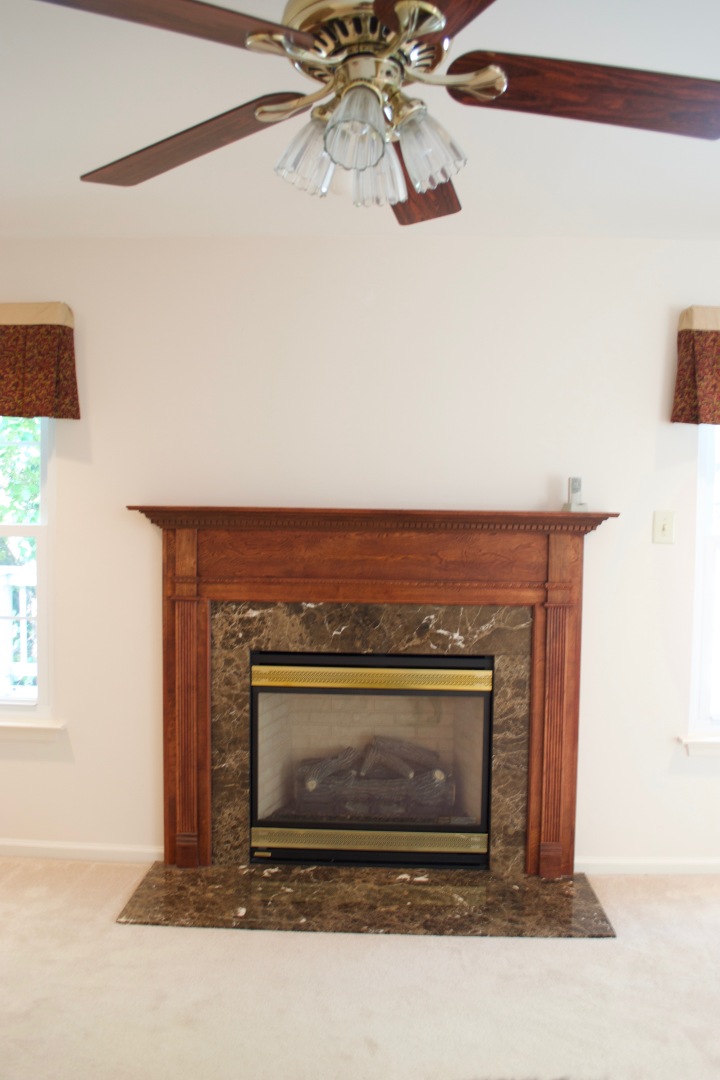
But the fireplace was in really good shape (our house is only 20 years old), and gutting it felt like a total waste. So I set out to remodel it without a total gut job. I knew there were a few things I could do that would make it look a lot cleaner and fresher. 1) Paint, 2) Replace the mantel with one that has cleaner lines, and 3) Simplify the look by removing all the trims.
The first thing I did was remove the top mantelpiece and all the decorative trims. I was basically left with a wooden box, the granite surround, and the granite hearth. I then primed both the wood and the granite (Kilz is my favorite primer) and gave everything 2 good coats of paint.
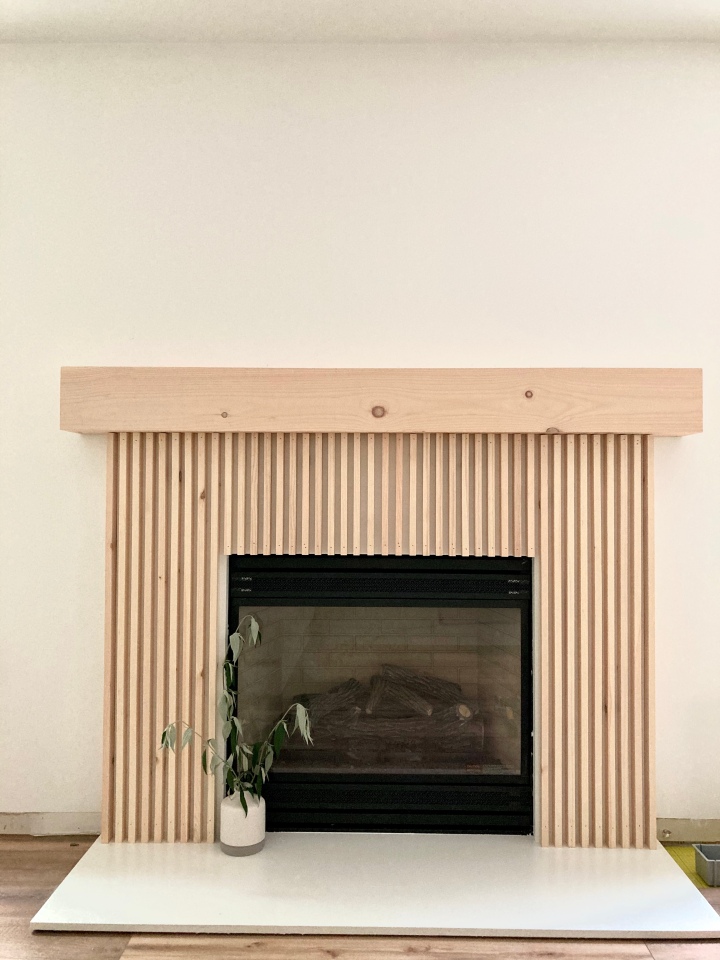
The original plan was to stencil the granite surround (where the granite frames out the fireplace). I gave it a go, but it turned out super messy, and it just wasn’t what I was going for. So I pivoted and decided to simplify and go for a Scandanavian-inspired look. I took some scrap plywood I had on hand, and used construction adhesive to adhere it onto the hearth. This made the entire fireplace surround all leveled. I then took a bunch of 1×2 and cut them to length and nailed them onto the surround to create a slat look that is very popular right now. I used a 1×2 itself as a spacer.
To make the chunky mantel, I used one piece of 1×8 and 2 pieces of 1×6 to create a box. Using the 1×8, I cut it to length to make make the front and two side panels. I cut these at a 45° angle, so it looks a lot more seamless and actually looks like one big block of wood. Using the 1×6, I cut to length a top and bottom piece to fit inside the front and side panels. For the bottom panel, I used a jigsaw to cut the width and depth of fireplace, so that way the mantel and just slide on from the top and sit on top comfortably. After that, it was a lot of wood glue and clamping to make it all secure. Once the mantel was finished, I finished it with two coats of Minwax Pickled Oak stain. Then I attached the mantle to the fireplace using screws.
To finish, I spray painted the fireplace grates using a high heat spray paint in matte black.
This project cost about $60 (the lumber and spray paint). I didn’t count the primer and white paint since I already had those on hand. This fireplace makeover totally sets the tone and vibe of the house, and I couldn’t be happier with the results.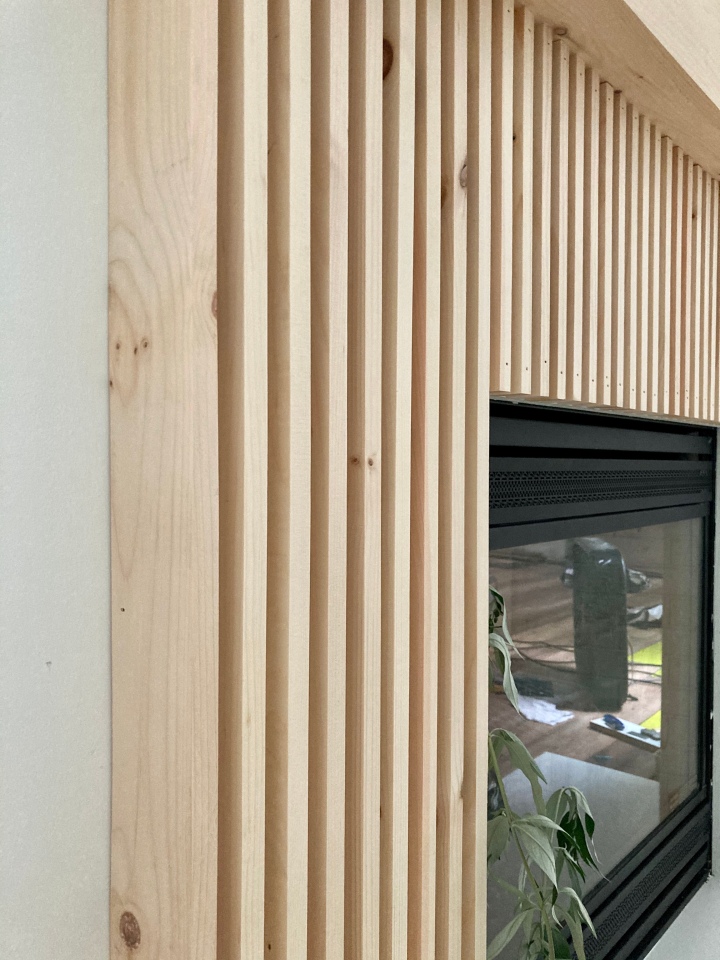

Looks great BUT code says you can’t put wood (a flammable material) within 12″ of the firebox. That’s why fireplaces have brick or tile or marble on them. Your house could catch on fire and your insurance may not cover it.
LikeLike
But that’s an electric fireplace… so… 🤔
LikeLike
I would like to know where I could find a screen of that design. If it’s the correct size for our makeover, it would great for my plans.
LikeLike
amazon im sure sells it
LikeLike