

Hi friends! I hope you are doing well, wherever in the world you are. Due to the COVID-19, Philadelphia and its surrounding counties are officially on “lockdown”. This means that all non-essential stores are closed, and most people are working from home. Since I’m a higher education consultant and a teacher, I’m currently not working since schools are effectively closed. To look at things in a more positive note, this means I can spend so much more time on home improvement! Luckily, home improvement stores like Lowe’s and Home Depot remain open (for now).
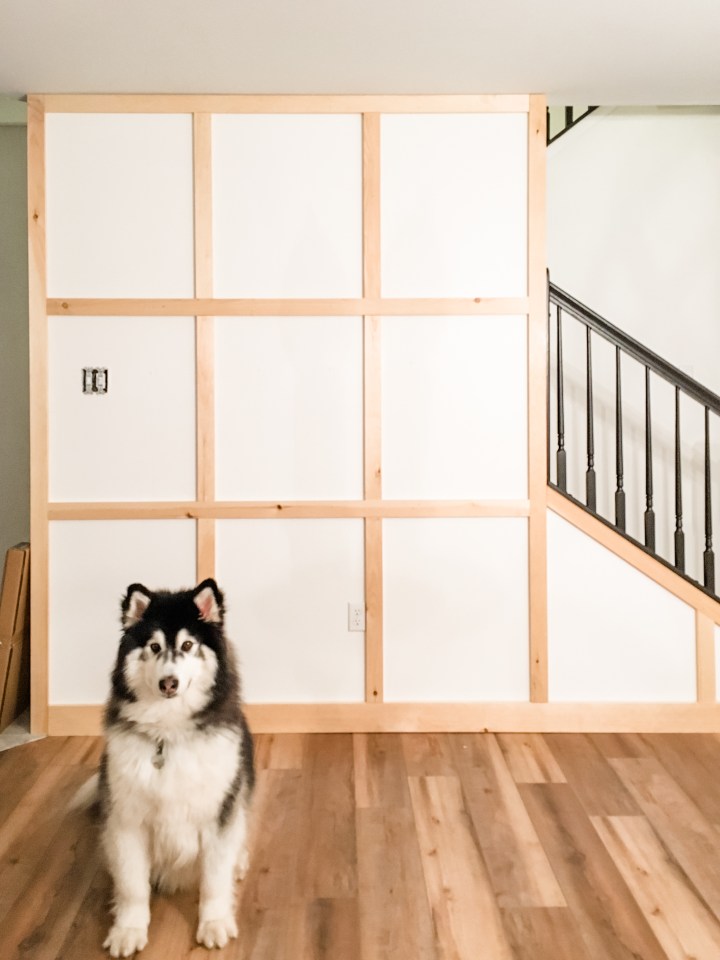
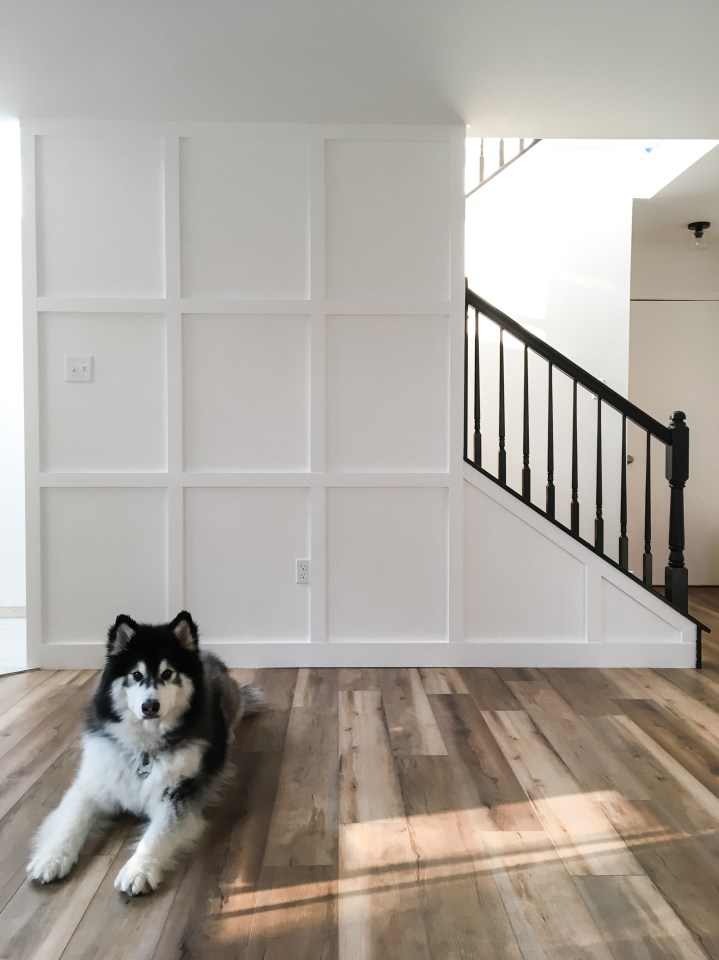
I decided to tackle my very first board and batten wall. I chose this wall right off the entry of our new house. This wall also serves as the wall that “cover” part of the staircase. Since this wall is along the walkway to the rest of the house, I wanted to create something that didn’t draw too much attention away from the rest of the house, but still give the entire space a more elevated feel. I chose a standard grid pattern for this board and batten, and I think it turned out great.
All told, this project took about 6-8 hours. Although I did split this project into 2 days and worked on other things simultaneously. Since every houses’ walls will be different dimensions, I’ll give vague instructions on how you can achieve the same look in your home!
First things first, you’ll need to measure your wall to figure out how much wood you need to purchase. I chose to do a thicker board on the bottom to act as a baseboard, so I first measured along the bottom of the wall to figure out how long of a piece I need. Then I measured the height of the wall (I have standard 8′ ceilings, which meant I could just buy standard stud length pieces), and figured out how wide I want my spacing to be, then I measured the length of the wall, and figured out how I want the spacing to be. Besides the baseboard piece, I chose 1×3 boards, so I just added all of them up. I purchased 1 extra 1×3 just in case I made any errors in cutting.
Next, it’s time to head to the store and purchase all the supplies!
Supplies you’ll need:
– 1×3 – I purchased 8′ stud length pieces, and I used 9 pieces in total
– 1×5 – I needed 10′ of this, but my store only carried 8′ sections, so I purchased 2 pieces
– Protractor
– Stud finder
– Level
– Caulk
– Caulk gun
– Putty knife
– Wood filler
– Sanding sponge
– Primer & paint
Tools you’ll need:
– Miter saw (or any other saw you have)
– Nail gun
Before you start attaching the boards to the wall, you’re going to need to find where the studs are. After I found the stud, I used a vertical line so I have an idea of where my studs are. I found the easiest way to do this was first nailing in the baseboard piece. I then “framed” out the perimeter of the wall. I used a protractor to figure out the angles of any non-90° edges.
Some tutorials out there suggest nailing in vertical pieces first and then fill in with horizontal pieces. But the issue is that most likely, some of your vertical pieces won’t land on studs. Most people then suggest using construction adhesive to help the boards to adhere to the wall. I wanted this to be as simple as possible, so I did my horizontal boards first, making sure they hit all the studs. Then I cut the vertical pieces to fit between the horizontal pieces to create the grid.
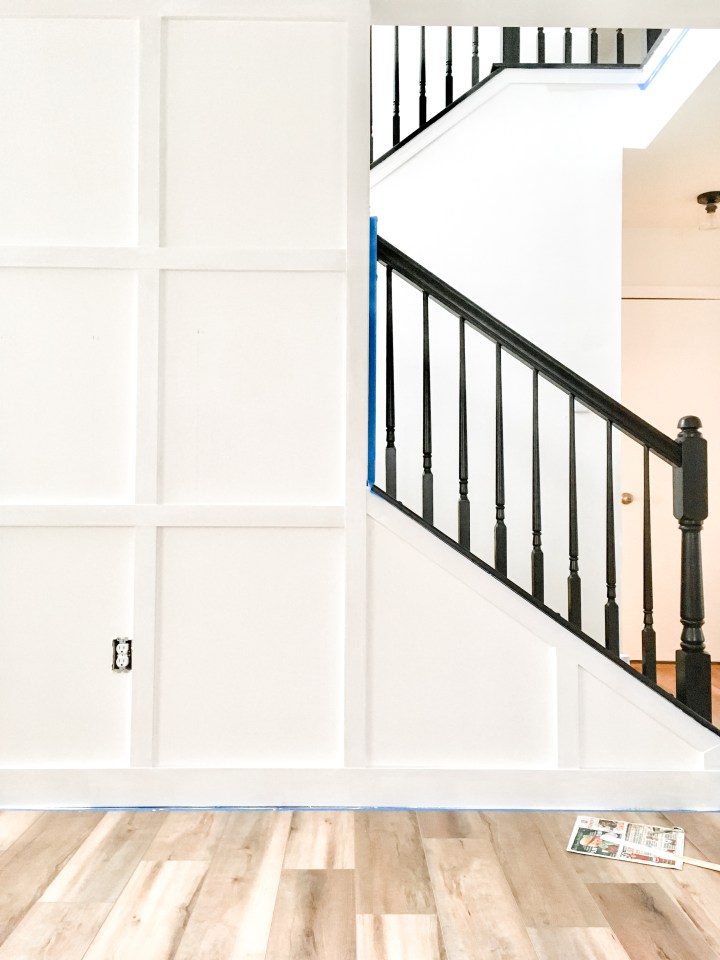
When everything is all nailed in, it’s time to fill in all the holes. Pro-tip* – if your boards have knots in them, put a skim coat of wood filler over the knots, this will help hide them better once it’s painted. I used a putty knife to push the wood filler in the holes. I then moved on to caulking around all the seams and edges. You want this to look very built-in, and caulking will also hide a lot of imperfections. After the wood filler has dried, take a sanding sponge and lightly sand the filled parts smooth.
Since the wood might have knots and imperfections, it’s important to use a primer that hides them. I did 2 coats of primer and then followed up with paint (I used the same paint color as my wall.
That’s it! All there’s left to do is sit back and enjoy your newly built board and batten wall!

3 thoughts on “Board and Batten Wall”