

Because of quarantine, I’ve lost track of all time. So it’s hard to believe that we’re going on 11 months of being the proud owners of Squirrel Estate. When we got the keys, I immediately painted the walls and trims. Then in January, I chose an accent wall color and painted that. In April, I removed all the carpet in the room and laid down LVP throughout, and attached new baseboards. In May, we added a shiplap wall. Then, the room came to a standstill.
Our house has so much to update that when Ian asks “what are you working on today?” I feel like I could just spin around and point randomly and there will be something I need to do.
Our bedroom has taken a backseat to a lot of other more “urgent” projects. But at the behest of my parents, I decided to dedicate this month to really finishing up our bedroom, which includes the closets and bathroom (more on that at another time). Their logic is that living in a constant construction zone cannot possibly be good for my physical and mental health. They’re not wrong. This week, I’ve had the best sleep in a while because our bedroom finally feels like the oasis I’ve been craving.
Last week, I worked nonstop to bring us closer to the finish line. That included removing the popcorn ceiling, patching and painting the ceiling; painting the ceiling fan; and doing yet another board and batten wall.
The popcorn ceiling has been a point of contention between me and Ian. Last year, I received a quote of $1700 to remove the popcorn ceiling, patch and paint. Something about that just always seemed really unreasonable and I just never felt comfortable going through with it. Especially because our room isn’t extremely large, and I knew for a fact that the acoustic sprayed on contained no asbestos. Ian, on the other hand, thought that since our bedroom has vaulted ceilings, it’s just better if it’s left to the professionals. Since Covid happened, we’re more careful about letting contractors into our homes unless it’s absolutely necessary. So I took the time to convince Ian to let me try removing it. I found this product called Homax Popcorn Ceiling Scraper for $15 thinking it’s a really small investment. To my surprise, this thing rocks.
To prepare the room, I tarped all the floor. In retrospect, I should’ve tarped all the walls too because I did spend quite a bit of time cleaning up goop off the walls. To remove the popcorn ceiling, I simply filled a spray bottle all the way up with water, added a teaspoon of fabric softener, and sprayed the ceiling with the solution. I worked in patches of 4’x4′. After letting the solution sit for about a minute, I used the popcorn ceiling scraper and scraped. It came out extremely clean and smooth, and didn’t leave many gouges or nicks. Around the corners, I used a 4-inch putty knife to scrape. The popcorn ceiling scraper comes with a bag holder, which is super helpful because it contained most of the debris. And since I had wet the ceiling first, there was minimal to no dust.


After that, I let the ceiling dry overnight. The next morning, I patched any area on the ceiling where I dinged it. I let the compound dry and followed up with 2 coats of ceiling paint.
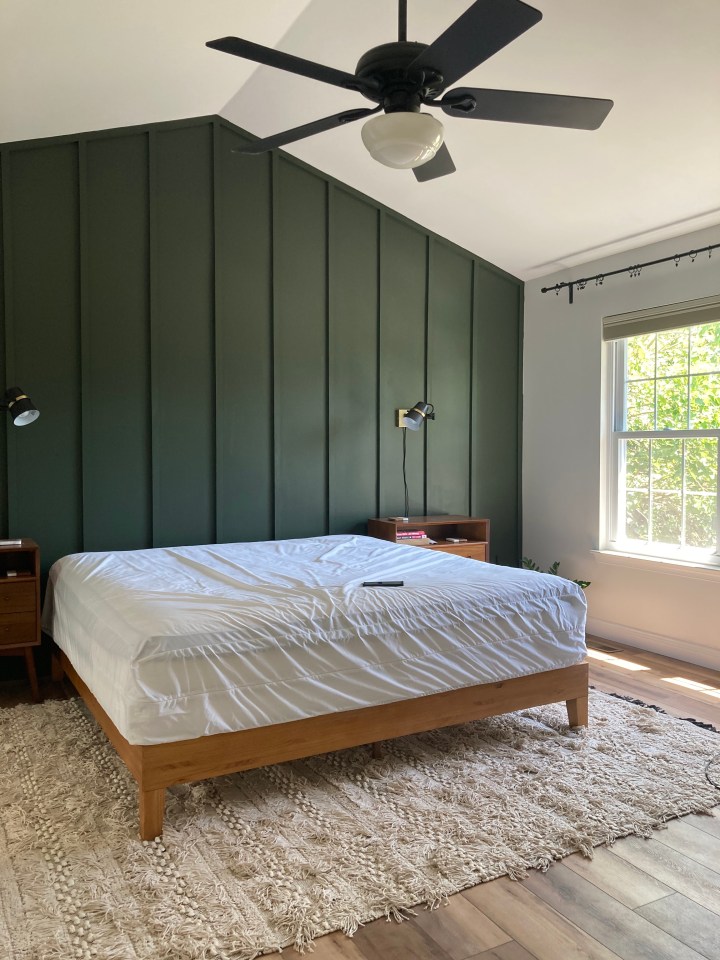
Before painting the ceiling, I painted the ceiling fan. I figured now is the best time to paint it, especially because I could paint it in place, and everything is protected so it’s not that big of an issue. I took down the glass shade and covered any exposed electrical connections. I then wiped down everything with a degreasing cleaning solution and vacuumed to make sure there were no dust in the interior chambers. I then spray painted the entire thing with 2 coats of matte black spray paint.


The next day, I decided to add a board and batten wall treatment to the accent wall that I had already painted. I decided to make it really simple, and really maximize the height of the room. Our ceiling reaches about 10′, and I want to make sure that my board and batten reaches all the way to the top. I ended up using fifteen 1x2x10 to create the wall treatment. I framed out the out top and sides first, and started from the middle and worked my way out, spacing each board about 13.5″ apart. For more detailed instructions on board and batten, check out what I did downstairs and in the guest room.


After everything was completed, it was time to put the room back together. The room is still not 100% done. We still need to find a curtain to hang. There are really large, empty walls opposite the board and batten wall, and I still need to paint the door. But I’m going to celebrate that we have a place that we’re happy to relax and rest our head at the end of a long day.
(Disclosure: Some of the links below are affiliate links, meaning, at no additional cost to you, I will earn a commission if you click through and make a purchase.)
Sources:
Flooring – SMARTCORE Pro LVP in Sugar Valley Maple
Rug – Beige Ellena Handmade Tassel Rug
Lighting – Globe Electric McKibbin Wall Sconce
Bed – Zinus Alexia Wooden Platform Bed
Nightstand – West Elm Grand Nightstand

What is that color please???
LikeLike
What’s the paint color ? Beautiful!
LikeLike