
Happy New Year! I took a 2 week break for the holidays to recharge and it was very much needed. But after those few weeks away from my tools, I miss them so much and I’m so excited to be back at it again! For the month of January, I have a few projects that are on the docket – building an outdoor cat house/catio, finishing the tub skirt, and starting on my library built-ins. As those projects get underway, they’ll get their own posts, soooo let’s circle back to this moody board and batten that I did for my friends back in December.
As I continue to hone my skills for DIY, home improvement, and design, I often think about how I can utilize my skills to help my friends and community to achieve their dream home. A few months ago, I asked my friends if I could gift them a room makeover, and luckily, they trusted me enough to say yes!
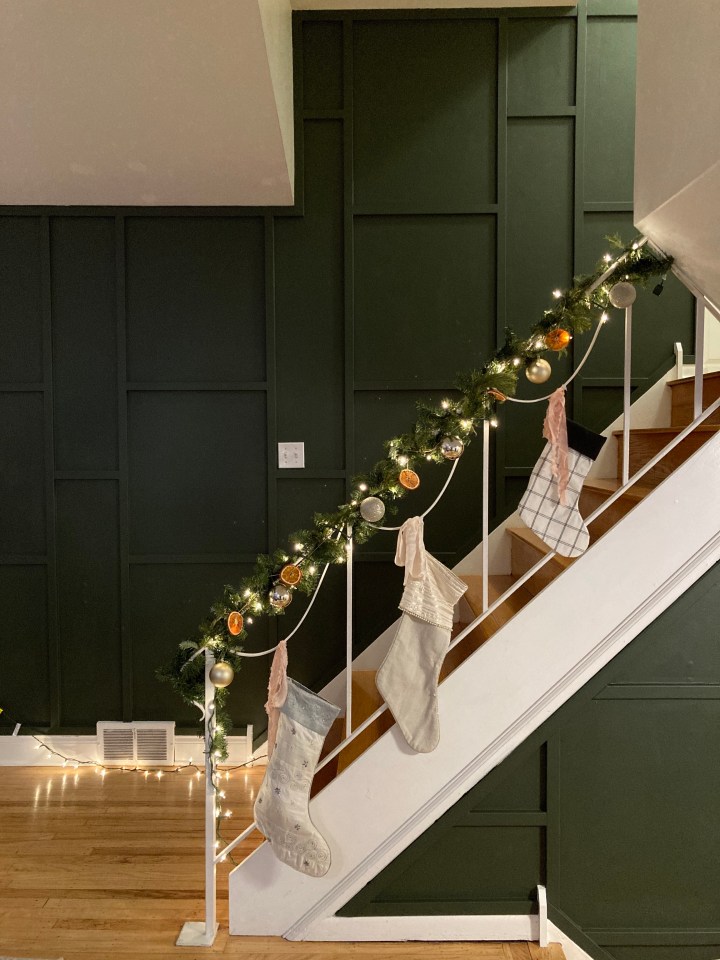
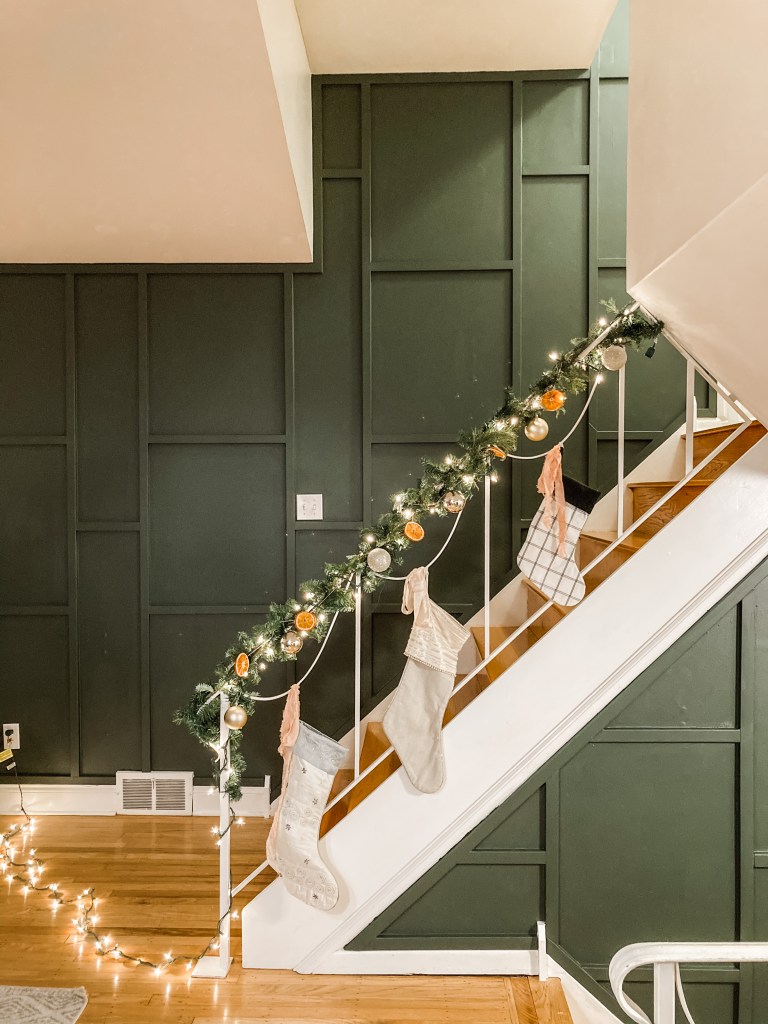
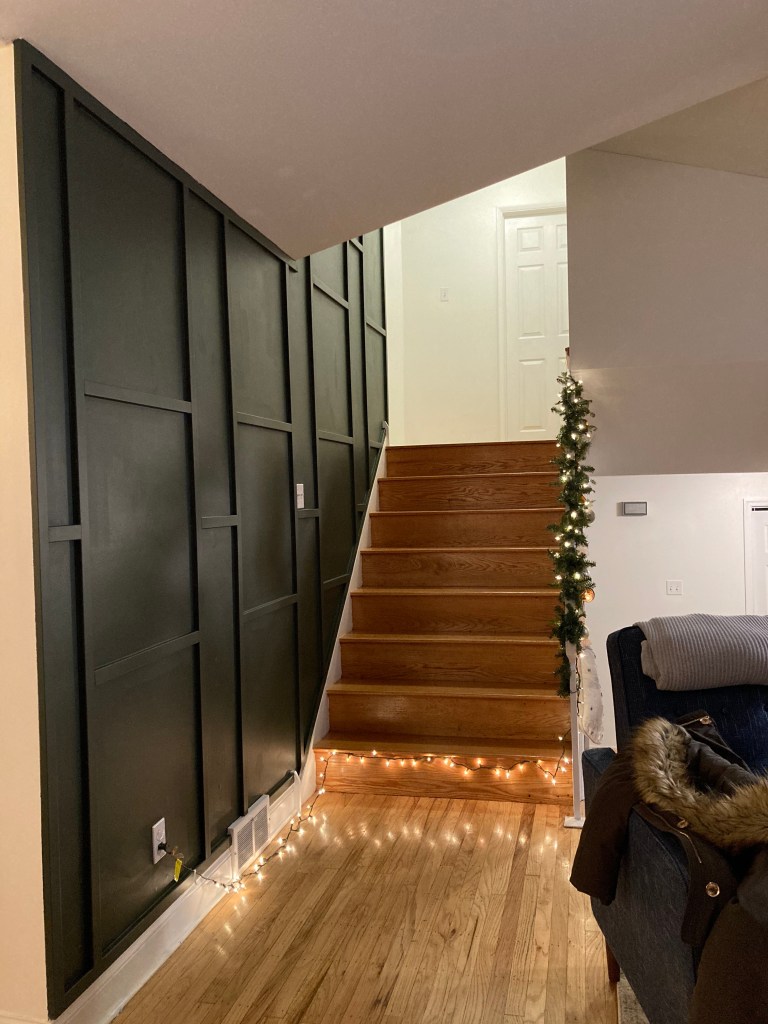
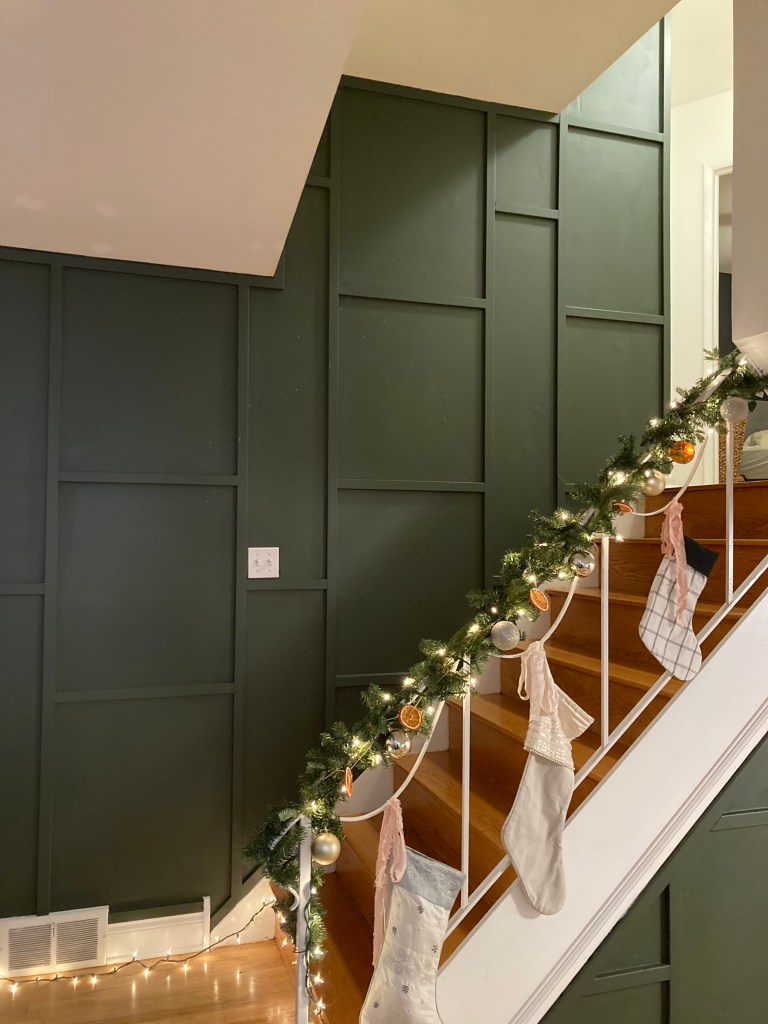
My friends, Josh and Kelli, own a 1950s split-level home. Like many homes built around that time, top selling features are hardwood floors, clean-lines in design, and mid-century modern furniture. Built-in features and accent walls weren’t very much in focus. So the “room” they chose ended up being the walls that are against the staircase going from the entry to the main floor, and from the main floor to the second floor. To give the wall a little bit more interest, they wanted a board and batten accent wall. I gave them the homework of figuring out what design they wanted, and they played with various designs for a few weeks until they settled on an offset board & batten. They like how the design had the offset look, and also played with both wide & narrow widths.


Design & Photography by Note Design Studio
With the task at hand, I went to Lowe’s to gather all the materials. This project ended up being very affordable because I used 1×2 primed MDF for all of the board and batten. Although all of my previous board and batten projects, I used unprimed pine, I opted for MDF this time for a few reasons. 1) It comes primed! It saved me so much time to not have to fill in all the knots and priming them, 2) being a manufactured product, it’s much straighter than pine, which saves me time at the store picking out the perfect pieces, and 3) it’s very flexible, which was really helpful because their home is older, it’s safe to assume that none of the walls are straight. Forcing a piece of wood to conform is much harder than a flexible MDF! I used about 25 1x2x8 primed MDF strips and leftover paint from my bedroom (Sherwin Williams Green Labyrinth). Plus materials like caulk, paint brushes, and nails, the total amount came down to under $50! Which is amazing considering that it covered two walls!
I have to be honest, I completely underestimated how long this project would take. I think the space being not square makes it harder in terms of getting measurements and angles. Also, being on a staircase meant having to climb up and down many times. But even with delays, the project took about 3 days.
- Day 1 – paint all the walls a new color
- Day 2 – cut and install all the board and batten pieces
- Day 3 – caulk, patch holes, and paint over the board and batten
To avoid repeating myself over and over again, I’ll just refer you guys to a few other times I did board and batten if you’re interested in a tutorial. What I love about board and batten is that once you have the skills down, it doesn’t matter what pattern you choose in the future. It’s all the same steps in achieving the look.
- Classic board and batten in the guest room
- Grid board and batten in the living room
- Vertical board and batten in our bedroom
Now for some before and afters!
Before

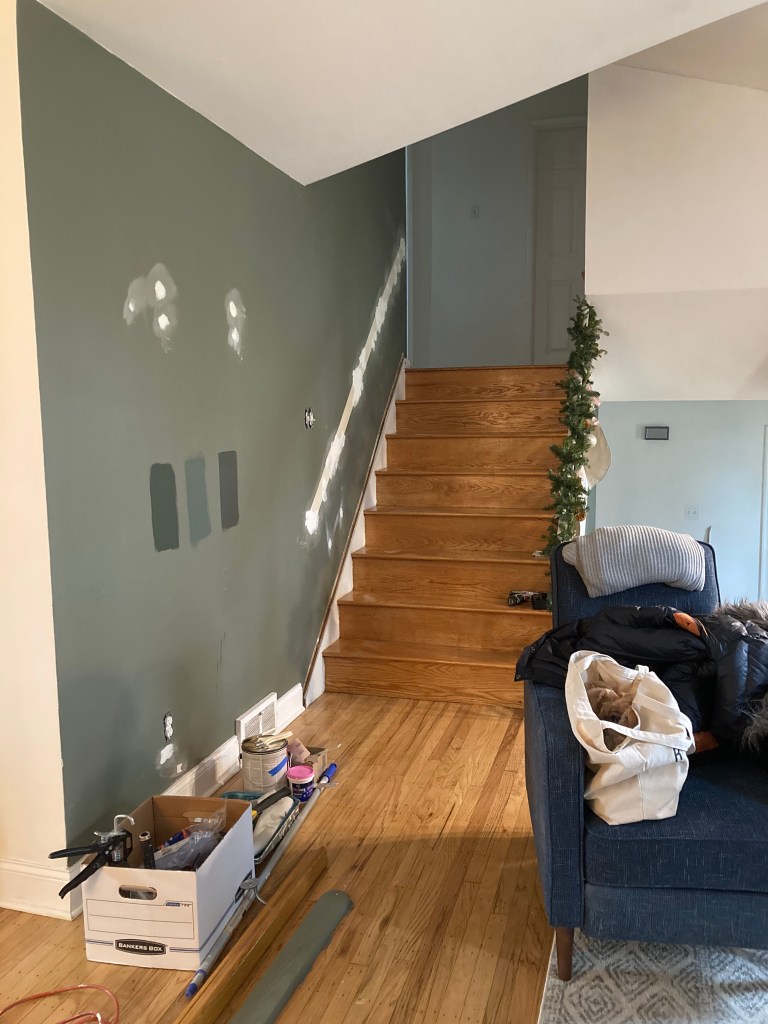


I removed the handrail on the right side (it’s still up-to-code since they have a handrail on the left side of the staircase). I patched all the existing holes in the wall and swatched some paint before painting.
After


What color green and what finish did you go with?
LikeLike
how did you get all your measurements so everything fit perfectly?
LikeLike